
Hey, gorgeous! Today, I’m excited to share with you the art of contouring and how you can enhance your facial features like a pro. Contouring has become a popular makeup technique that allows you to define and sculpt your face, highlighting your best features and creating a beautifully chiseled look. So, let’s dive into the world of contouring and unlock the secrets to achieving a flawless and sculpted face!
Contouring is all about creating shadows and highlights to shape and enhance the natural structure of your face. By strategically applying darker and lighter shades of makeup, you can create the illusion of sharper cheekbones, a more defined jawline, and a slimmer nose. It’s like giving your face a little makeover!
First things first, you’ll need the right tools and products for contouring. Invest in a good quality contour palette that includes shades suitable for your skin tone. Look for matte powders or creams that are a few shades darker than your natural skin color for the contouring shades. For highlighting, choose shades that are a few shades lighter than your skin tone with a subtle shimmer or satin finish.
Before you start contouring, ensure that your face is well-prepped and primed. Cleanse your face, moisturize, and apply a primer to create a smooth canvas. This will help the contour products blend seamlessly and last longer throughout the day.
Next, let’s focus on the key areas to contour. Start by identifying your face shape. Whether you have a round, square, oval, or heart-shaped face, there are specific techniques to enhance your unique features.
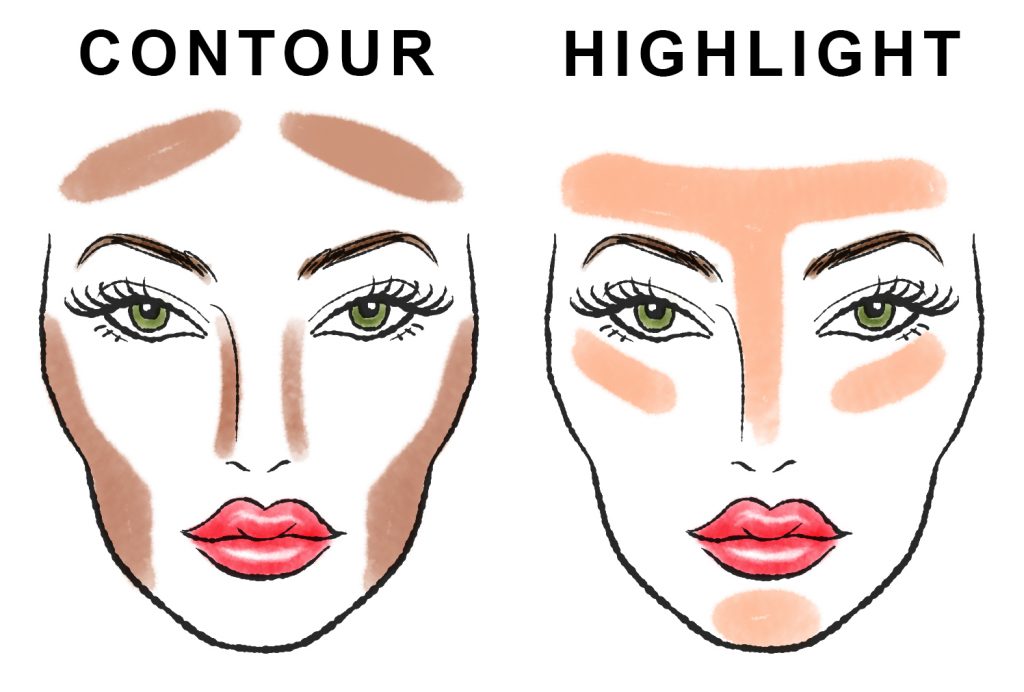
To contour your cheekbones, suck in your cheeks and apply the darker shade just below the cheekbones, blending it upward towards your temples. This creates a subtle shadow effect, making your cheekbones appear more prominent.
For a slimmer nose, apply the darker shade along the sides of your nose, starting from the bridge and blending it out towards the nostrils. Remember to blend well for a natural-looking result.
To define your jawline, apply the darker shade along the jawline, blending it downward towards your neck. This creates a more sculpted and defined jawline, giving your face a lifted appearance.
Don’t forget to highlight! Apply the lighter shade on the high points of your face, such as the tops of your cheekbones, the bridge of your nose, the center of your forehead, and the cupid’s bow. This brings light to these areas, giving your face a beautiful glow.
Remember, blending is the key to achieving a seamless and natural-looking contour. Use a clean blending brush or sponge to blend the contour and highlight shades together, ensuring there are no harsh lines or uneven patches.
Once you’ve mastered the basic contouring techniques, feel free to experiment and adapt them to your own unique features. Contouring is a versatile technique that allows you to play with different looks and styles, whether you prefer a soft and natural contour for everyday wear or a more dramatic sculpted look for special occasions.
So, my lovely readers, embrace the art of contouring and enhance your facial features like a pro. With the right tools, products, and techniques, you can achieve a beautifully sculpted face that highlights your natural beauty. Get ready to turn heads and feel confident in your own skin!


+ There are no comments
Add yours